HOW to make This SPACE GIF
step 1
first thing is to make the background layer black.
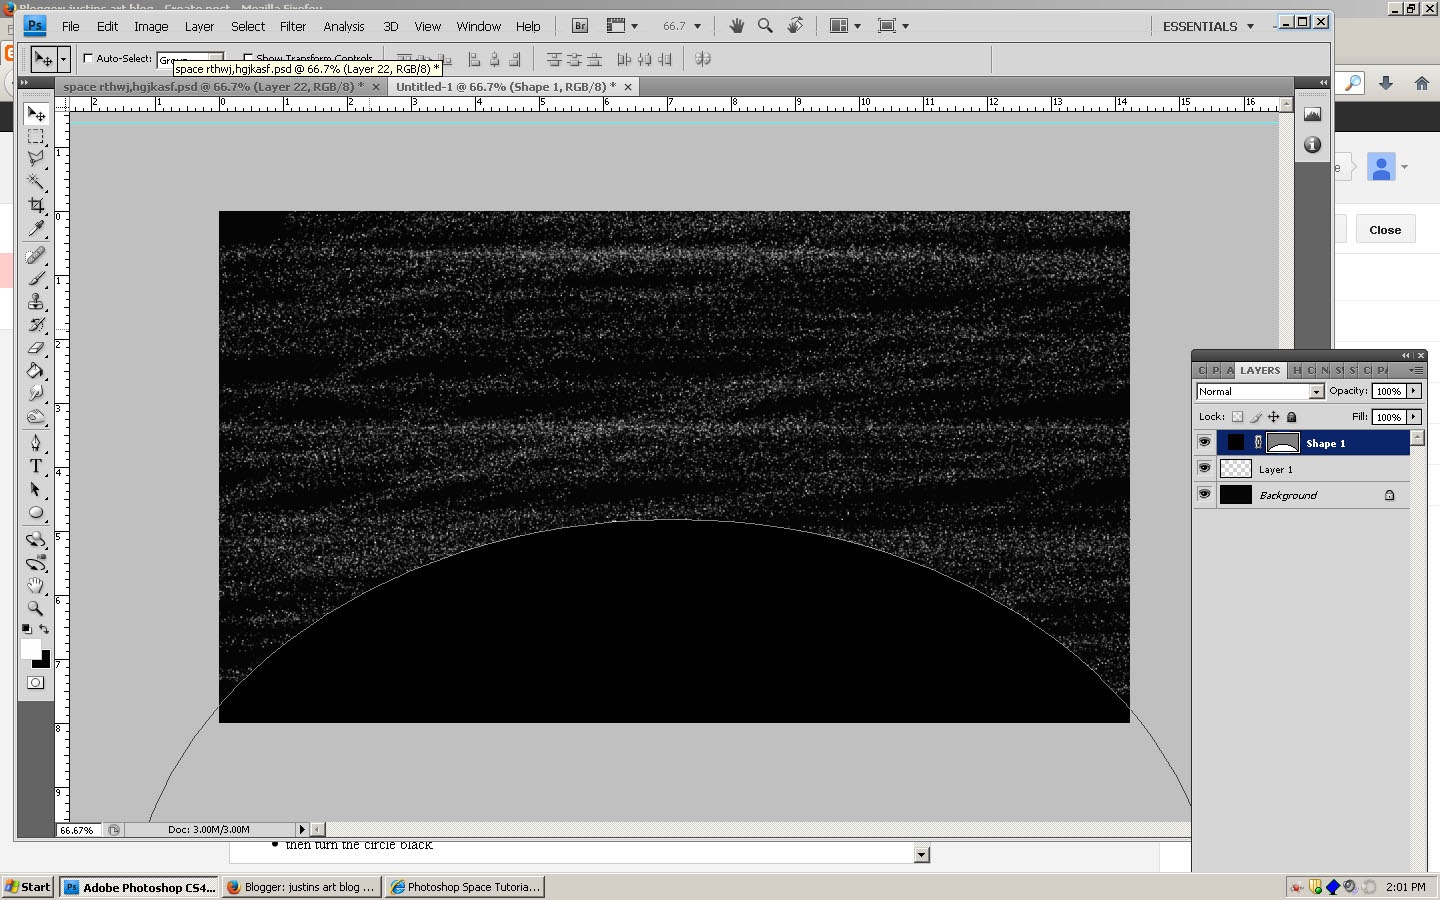
next you want to select a brush and make it 3 pixels and white
after that you go to the window tab and select the brush tab
Step 2
- shape Dynamics settings -size jitter 100%
- Scattering- turn on both axis, axis 1000%, count of 1
- other dynamics- flow100%
- then before painting across create a new layer then paint on it
Step 3
- Use the ellipse tool from the tool bar to draw out an big circle that covers just a little bit of the bottom of the picture
- then turn the circle black

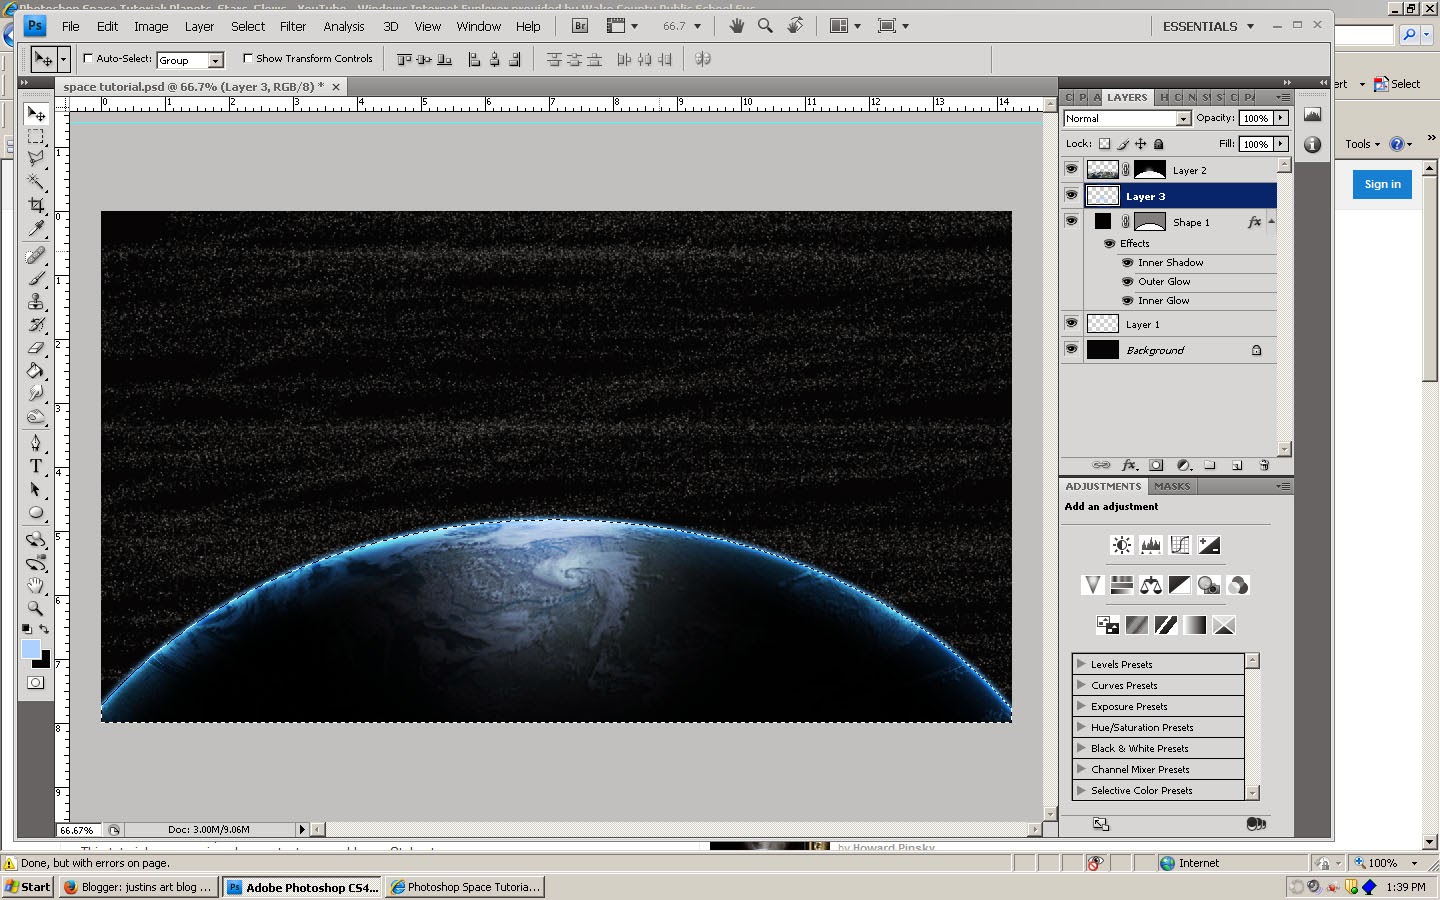
step 4 - add an outer glow, inner glow and, inner shadow.
- click on layers tab at top and go to layer style and click on inner glow
- Inner glow- blend mode= linear dodge, color 62e7ff, size 20, range 60
- Outer glow- blend mode= linear dodge, color 59b3ff, size 10
- Inner shadow-blend mode= linear dodge, color 3599ff, turn off global light, angle 90, distance 10 and size 70
- Search up on Google for a planet texture.
- copy and paste the planet texture you find to a new document then drag it onto the space document.
- place the texture just over the circle
Step 6
- To add the round feel to the planet you need to hold the control key and click on the circle on the layer area.
- once you do that, than you click on the filter tab, then click on distort, then spherize.
- once you have spherized then press the add layer mask button to take away the extra texture
step 7
- On the layer with the planet change the blend mode to be overlay with an opacity of 70%
- then above the planet layer add a new layer
- next hold commander control and click on the circle again to select it
- then get yourself a big but soft brush, color aed077
- then just put bush stroke at the top of the planet

Step 8
- make a delicate of the planet layer
- then right click on the new layer then take off the layer styles on the new layer
- once you have clear the layer styles add another in glow to the new circle
- Outer glow- blend mode= linear dodge, 100% opacity, color 419aff, size 155 range 60
- the go into free transform mode, then squeeze the planet in so that the glow is higher in the middle
Step 9
- Add a new layer behind the to circle layers
- then take a white soft brush about 200 pix and make a dot at the very top of the circle
- next on another new layer draw a white horizontal line not much longer then the last thing glow you gust drew with a small brush
- then go up to the filter tab and click blur the then motion blur. set angle at 0 and distance at 500
- Create another new layer right above the stars layer
- next for the clouds you need to change the colors in the bottom left hand corner
- the top color should be 3e78cf
- and for the background color make it a pitch black
- next to add the clouds go to filter, then render than select cloads
Step 11
- Next add an levels adjustment to the clouds by going to image, then adjust then to level
- next change the middle number from 1.00 to .70
- Next duplicate the clouds layer
- on the bottom layer change the blend to soft light
- and on the top cloud layer lower the opacity to 25%
step 12
- find a picture of and satellite on Google then copy and paste it on to a photo shop document
- then use the magic wound tool and lasso tool to cut it out
- then drag it to the planet picture
step 13
- place the satellite in a place where it looks like it is orbiting the planet then save it as a jpeg
- next move the satellite very slightly in the direction you want it to be orbiting
- then keep doing this till the satellite makes it all the way around the planet
Step 14
- once you have all the layer saved in jpeg's open up all thejpegs and drag them onto one the first pic
- after you do that you are ready to start animating
- next you go to the windows tab and select animation
- once to have the animation bar up click the drop down on the right and select make make slides from layers
- that will make all of your layers turn into slides you can change the speed of the animation all depending on what you like
Last step
- when saving this go save it .
- go to file , then save for web and device and then make sure it is saved as a gif


